
This is my DIY PVC frozen ice containers experiment that I wrote many years ago. I wanted to make these containers to be used similar to those blue ice units you put in your cooler or picnic basket to keep food items cool before you need them.
They also come in handy to keep food cold if you lose power in your fridge or freezer. My experiment making these was about 8 years ago, but I thought my new readers would enjoy reading it, so I decided to update the post.
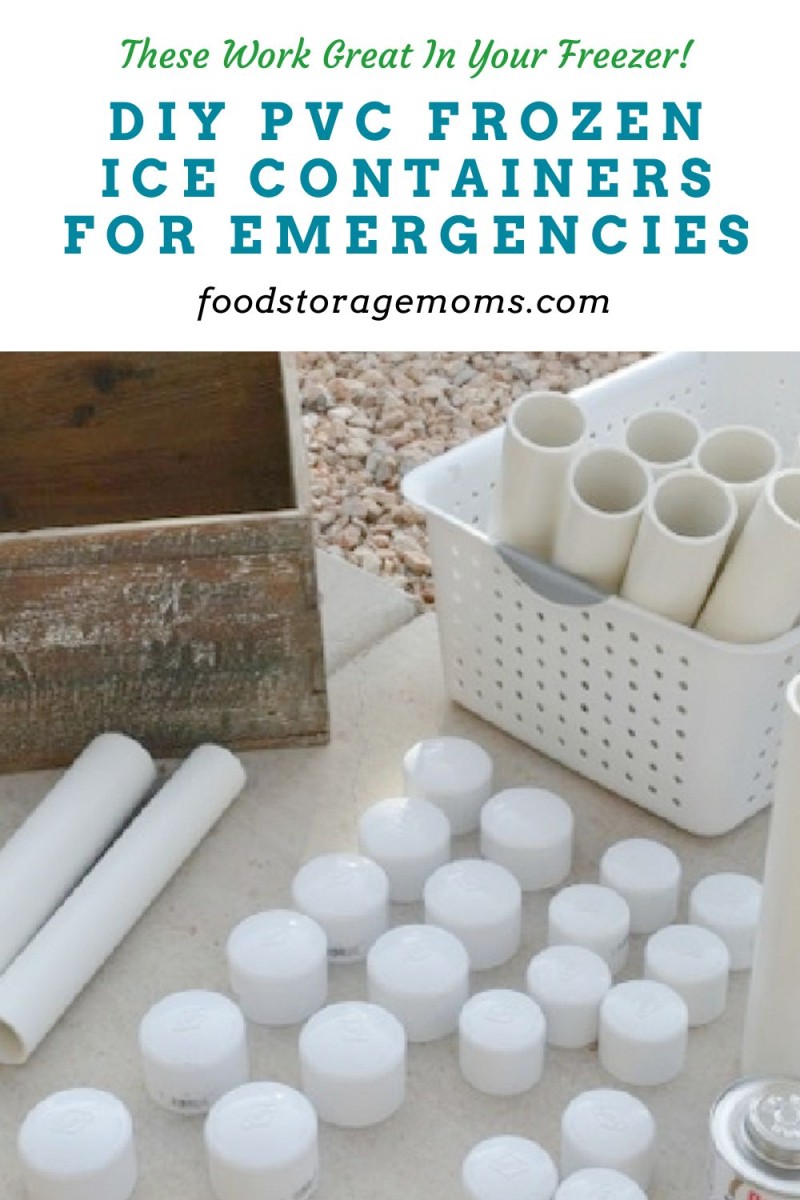
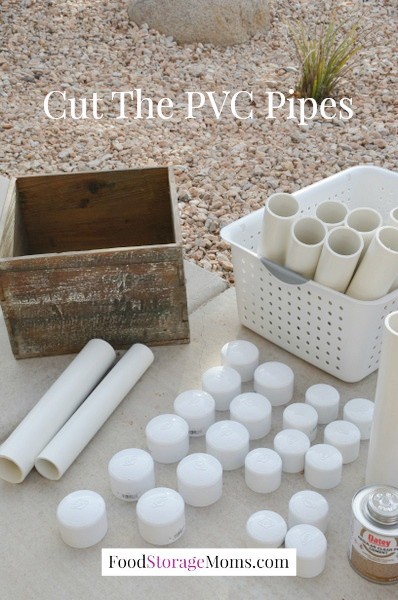
Cutting PVC
I went to Home Depot because they are close to my house and the staff is always cheerful to help cut my stuff. Home Depot told me they couldn’t cut the PVC with their regular chop saw, these had to be sawed by hand.
I have cut PVC at home with our chop saw but they have their rules and I totally get it, rules are rules. The employee just kept cutting by hand, although several contractors kept walking by and would tell the guy: “You can cut those with your chop saw a lot faster.”
We just laughed and talked while he used a saw to cut them by hand. I needed them 12 inches long. I bought a 10-foot PVC piece of pipe so there was no way I could take that home in my car. I love Home Depot!
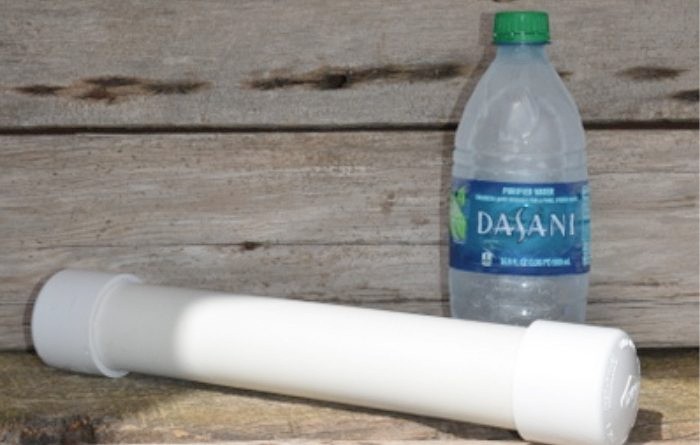
Today I am going to compare the 12 inches by 2-inch PVC frozen containers to a plastic 16.9-ounce size water bottle. Now, I must note that I had to open the water bottle and drink part of the water so it would not expand and break in the freezer.
I measured the remaining water in the plastic water bottle. It had 1-3/4 cups of water in it with the lid screwed on tight. The 12 inches by 2-inch PVC tube I filled with 2-1/4 cups of water. I filled the 12 inches by 1-1/2 inch PVC tubes with 1-1/3 cups water.
PVC Frozen Ice Containers
Step 1: Cut The PVC Pipes
As you can see, I have two different sizes of PVC pipes with the caps that go with them. I had all of them cut into 12-inch lengths. The glue is clear, and to be honest with you I wouldn’t drink the water if I had to break these open.
I’m sure some of the glue leaked inside the PVC tubes a little as I spread that little glue brush around. I wouldn’t waste the water if I had to empty them, I could use it for toilet flushing.
Step 2: Clean The PVC Containers
The first thing you do is clean the PVC tubes as well as you can. They must be dry before you can glue the one end. My hubby is a real sport to help me when I come up with these projects!
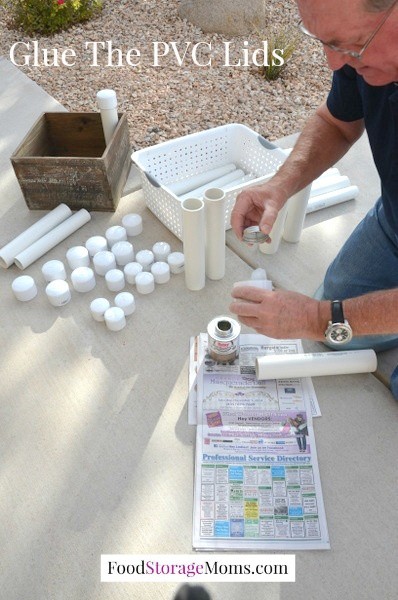
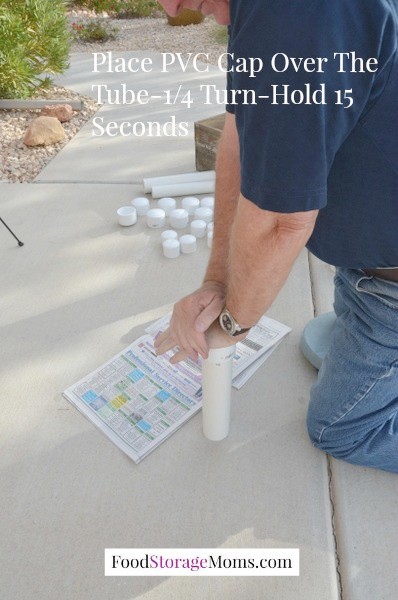
Step 3: Glue The PVC Tubes & Caps
The next step is to quickly apply the glue around the tube and the inside of the PVC caps. Then quickly put them together and make a 1/4 turn/twist and then press down for 15 seconds to hold the cap in place while the glue sets. Easy peasy! Be sure and have some paper towels or newspaper for drips, lots of drips.
Step 4: Let Dry for 24 Hours
I waited 24 hours for the caps to dry to make sure they wouldn’t leak. Here is where the measuring comes in. I realize I put the amounts of water to add in the dialogue above, but here they are again in plain sight:
12-inch by 2-inch tube = 2-1/4 cups water
12-inch by 1-1/2 inch tube = 1-1/3 cups water
Water Bottle 16.9 ounce = 1-3/4 cups water
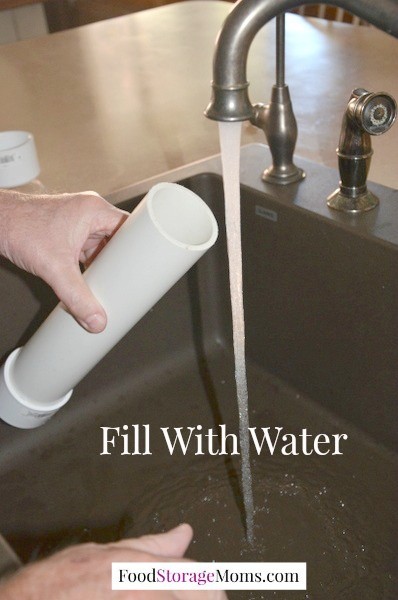
Step 5: Fill With Water
Now here is the tricky part. You need two people to pour the water into the tube and then glue the caps on the ends. The PVC tubes move. Trust me, they move and spill doing it yourself. Just giving you the heads up.
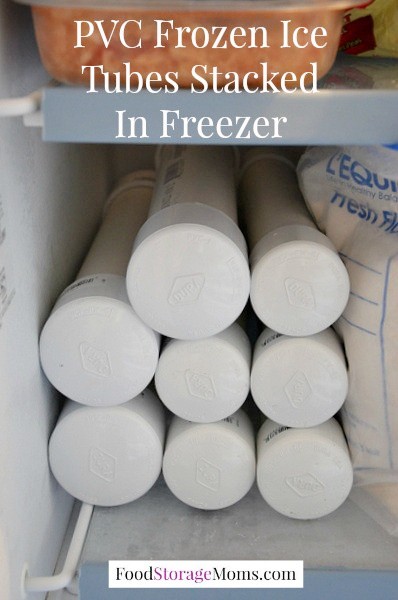
Step 6: Place Them in Your Freezer
Ask for help to fill and glue. Wait 24 hours to let the PVC dry and place them in your freezer.
Why would I want to make these when I can purchase the blue “freeze pack” ice packs products?
I enjoy making things that will not only save me money, but I can design them to fit my needs. Whether you plan to use these in an ice chest, fishing creel, cooler, picnic basket, or another portable storage container, these work great. If traveling or on a camping trip, you can put them next to your medications, frozen foods, eggs, and food containers like glass containers and storage jars, the items are protected. They are also so strong you don’t have to worry about leakage when the PVC tube freezes.
Are there any health concerns I need to worry about with these ice containers?
The main issue I’d be concerned about is possible burns from the frozen ice containers. They aren’t as cold as dry ice of course, but they can stick to your fingers if you don’t use some precautions and common sense guidelines like using gloves. When it comes to providing proper refrigeration when on the move, these should be safe and easy to use.
I also like the fact that they don’t contain any harmful ingredients or unwanted chemical like other products using a frozen gel pack. From a healthy use standpoint, you could use them to deal with sore or swollen muscles. You just need to put a towel or thin blanket between the ice container and your bare skin.
You can make them in various sizes and quantities that can come in handy when dealing with aches in your ankles, calves, or other parts of your body. When not in use, like when your freezer is too full, they’ll easily stack in a cheap storage container like cardboard boxes.
Final Word
Now my final results on which container would last longer in a power outage when used in your camping cooler, your fishing cooler, etc. The 12 inches by 2 inches PVC frozen tube stayed colder for about 3 hours longer than the other two. Obviously, it has more frozen water in it. The temperature where they’re being used will determine how long they take to thaw.
But the really cool thing, the PVC doesn’t sweat. Nope, it stayed dry sitting on my kitchen counter for the frozen/cold temperature experiment. I put the different-sized container tubes shown above in my freezer for a few hours. They are now ready to keep my perishables cold if they need to stay cold in an unforeseen disaster.
Now, if you had children with school lunch boxes or someone who takes a lunchbox to work, you could cut these smaller and fit any size lunch box. You can cut them to fit your exact cooler. WooHoo!
Put the fish you catch under these and they will stay cold out of the water in your cooler or creel until you get home. These stay strong long after the regular water bottles freeze, crack and leak. WooHoo! May God bless this world, Linda
Frank’s Idea
“Unless you ever plan to break or drill into these containers, there isn’t much reason to worry about the water’s purity. If you wanted to spend a few dollars more, you could use a threaded cap and the adapter thus making them into both a canteen and a freezer pack. I’d replace the water every six months as recommended for stored water.
Just as when using the PVC for plumbing, you’d allow the glue to dry thoroughly and then I’d give each container a wash with soapy water since we can’t just run water through them as if they were delivering water to a faucet. So, I would glue, let dry, and wash quickly and they’d be ready to use once you dry them off – at least the outside and the threads.”
Of course, as mentioned above, there’s nothing wrong with washing the cut PVC pieces in soapy water and rinsing them off before starting the water-filling and gluing process. The water is in an airtight environment so it shouldn’t deteriorate over time with things like mold. But if you have concerns, you could filter the water, boil it, or use halogen tablets for purification.
Thank you, Home Depot for cutting my PVC!
Survival Food Storage by Linda
The post DIY PVC Frozen Ice Containers For Emergencies appeared first on Food Storage Moms.